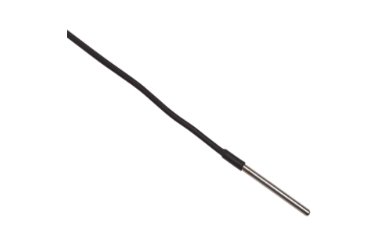
Датчик, погружной платиновый термометр сопротивления, 50 мм, от –200 до 160 °C
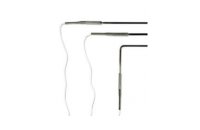
X = концевое устройство. Следует указывать «A» (разъем INFO-CON для 914X), «B» (оголенный провод), «D» (5-контактный разъем DIN для термометров Tweener), «G» (позолоченные контакты), «I» (разъем INFO-CON для 1521 или 1522), «J» (вилки соединителей типа «банан»), «L» (миниатюрные плоские клеммы), «M» (миниатюрные вилки соединителей типа «банан»), «P» (разъем INFO-CON для 1523 или 1524) или «S» (плоские клеммы).
| Аксессуар | Описание |
|---|
| 1924-4-10 |
Калибровка ПТС
|
| 1930-4-10 |
Калибровка системы путем сравнения, от –200 до 157 °C
|
The 5606 is just two inches (50 mm) in length with a sheath diameter of 1/8 inch (3.1 mm). Since it can be fully immersed over its entire temperature range, you don’t have to worry about calculating minimum immersion depth— immerse the entire probe, transition junction, and lead wires, in either non-corrosive liquids or dry mediums ranging from –200 °C to 160 °C.
The 100 Ω precision sensing element (alpha = 0.00385) is specially constructed to prevent the ingress of moisture while achieving calibration accuracies as good as ± 0.05 °C. You get both accuracy and flexibility built into a small, durable package.
The lead wires of the 5606 are made of single-conductor enameled copper wire which prevents moisture from wicking to the sensing element as it would if a more common, stranded lead wire were used. The diameter of the lead wire is no greater than 0.2 mm, making it easy to run lead wires through a freezer door to your readout or transmitter with effectively zero energy loss. The 5606 has been proven in common heat transfer fluids such as silicone oil, mineral oil, ethanol, and even liquid nitrogen with no degradation of the transition junction seal or lead wire insulation.
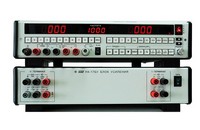
If you need longer lead wire than the standard length, call one of our Application Specialists today for a free quote. They can also help you determine which readout and probe termination are best suited for your application or help you select the right calibration for your probe.
| General Specifications |
| Temperature range |
|
| Nominal resistance at 0.01 °C |
|
| Temperature coefficient |
|
| Accuracy[1] |
| ± 0.04 °C at 0.01 °C |
| ± 0.06 °C at 160 °C |
|
| Short-term repeatability[2] |
| ± 0.03 °C at 0.01 °C |
| ± 0.04 °C at 160 °C |
|
| Drift[3] |
| ± 0.03 °C at 0.01 °C |
| ± 0.04 °C at 160 °C |
|
| Hysteresis |
|
| Sheath length |
| 50 mm ± 5 mm |
| (2 in ± 0.2 in) |
|
| Sheath diameter |
| 3.1 mm ± 0.1 mm (1/8 in ± 0.004 in) |
|
| Sheath material |
|
| Transition junction temperature range[4] |
|
| Sensor length |
| 30 mm ± 3mm (1.2 in ±0.1 in) |
|
| Sensor location |
| 3 mm ± 1 mm from tip (1.2 in ± 0.04 in) |
|
| Minimum insulation resistance |
|
| Minimum immersion length |
|
| Maximum immersion depth in liquid medium |
|
| Response time[5] |
|
| Self heating (in 0 °C bath) |
|
| Lead-wire cable type |
|
| Lead-wire length |
|
| Lead-wire temperature range |
|
| Calibration |
| Calibration not included. NVLAP accredited calibration available. See ordering information. |
|
[1] Includes calibration and 100 hr drift (k = 2).
[2] Three thermal cycles from min to max temp, includes hysteresis, 95 % confidence (k = 2).
[3] After 100 hours at max temp, 95 % confidence (k = 2).
[4] Temperatures outside this range will cause irreparable damage.
[5] Per ASTM E 644.
| Calibration uncertainty |
|
|
5606 |
| Temperature |
1924 Calibration Uncertainty† |
Tolerance w/out Calibration‡ |
| -197 °C |
0.03 °C |
0.4 °C |
| -38 °C |
0.03 °C |
0.2 °C |
| 0 °C |
0.03 °C |
0.1 °C |
| 100 °C |
0.045 °C |
0.3 °C |
| 157 °C |
0.05 °C |
0.4 °C |
|
|
|
|
† Lab code 200348-0
‡ Each PRT includes a certificate with a measured R0 value.
An uncalibrated 5606 meets ASTM E 1137 Grade A Classification of Tolerances. Use the coefficients below to achieve the tolerances listed in the “No Calibration” column or calculate the Grade A tolerance using the following formula: Grade A = ± [0.13 + 0.0017|t|]°C where: |t| = value of temperature (°C) without regard to sign. See ASTM E 1137.
R0: Enter the R0 value provided
A: 3.9083 x 10⁻³
B: –5.775 x 10⁻⁷
C: –4.183 x 10⁻¹² |
